Painting in Acrylic Medium: The Process You Can Follow For Any Subject Matter
When I'm tasked with a portrait commission, the first few stages are the most vital to my success in its final creation. Now, as a disclaimer, I am no expert, but simply an intermediate striving to improve just like you.
That being said, these tips are what I've learned from other artists before me. Whether it be from my High School AP Art class teachers or from the many professional artists I follow on social media, each of these steps I'm about to share with you are used by artists universally and are effective in practice.
Pre-Step: Materials
As every artist knows, you can't create without materials. Every artwork comes from the combination of two or more things and in our case, we'll be needing several.
1. A Good Reference
Before you even think about putting paint to canvas, you need a subject matter (unless you're dabbling in the abstract, like paint pouring).
2. A Sketchbook for Thumbnails
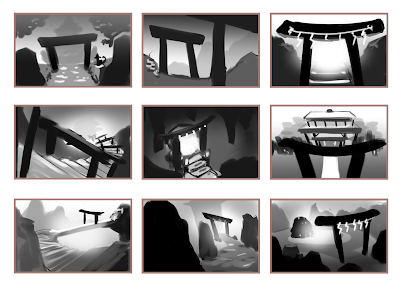
Thumbnails are small drawings that represent the future version of an artist's work. Making several smaller versions of an artwork (and the subject of said artwork) helps to determine the best composition for a piece.
Although a tedious endeavor at times, creating thumbnails helps prevent "start-overs" --in which case an artwork is scrapped (or painted over)-- by simply solidifying an idea into a plan of action, giving an artist a more prepared and definitive sense of direction while creating.
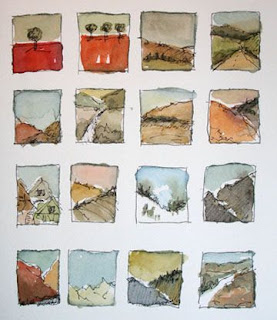
Here are some examples of thumbnails:
 |
| photo credit: BOKEHMANO |
Which composition do you find most appealing?
When creating thumbnails, the subject matter doesn't have to be very detailed, in fact, you're better off leaving it as simple as you can make it. The main objective while creating thumbnails is to decide the composition, and you can even add color to help decide your palette.
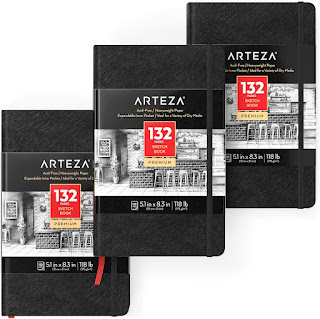
For creating thumbnails, I recommend a small mixed media sketchbook like the one from Arteza pictured below. They're a perfect size for individually paged sketches, but you can without a doubt use a regular-sized sketchbook as well, but keep the thumbnails small.
3. Print Out the Photo and Grid
If you're using a photo reference, print the photo on glossy or matte photo paper that correlates to the size of your canvas. For example, if your canvas is 16"x20," print the reference on a 4" x 5" sheet, so when you grid the photo (using 1inch x 1inch squares), it can easily be translated onto canvas (using 4inch x 4inch squares).
If you don't want to grid the photo by hand, you can also use a grid tool app, like the Grid Drawing Tool for Samsung, in which you simply put the number of rows and columns you want (4 columns, 5 rows ). After you've got your grid, save the image to your phone and print it out. All that's left for you to do is grid the canvas.
4. Sketch
Now that you've gridded your canvas, you are ready to start sketching. Observe the boxes carefully as you draw.
*a quick tip: turn the canvas and photo upside down to draw. It tricks your mind into seeing shapes rather than the faces you're observing*
Ask yourself as you sketch, "Where do the lines connect? What shape am I seeing here?"
Get as close to the original reference as you can (practice makes progress) and when you feel it's as close as it can be move on to step five:
5. Seal with Mod-podge
Now, why would we seal a sketch when we're just going to be covering it up? The best answer to that question is that doing so keeps the graphite from mixing into your paint, which would otherwise make your paint muddy.
When you seal the sketch, don't be alarmed, the pencil graphite will spread outside the lines you've drawn, but as long as you see your base sketch, the rest can be ignored as you begin painting.
6. Paint
Against what I was taught in school, I typically started on the portrait right away, while my teachers insisted I start with the background. To each their own, as they say. What works for me, works for me.
As you paint, accept that there will be an ugly stage to what you're creating. From base colors to shadows, to details and highlights, painting is a long, careful process: constant viewing between photo and artwork, times of intense focus, breaks, re-focus, and finishing touches.
With persistence and practice, you'll surely create something you're proud of.
I hope this article helped you in some way, I wish you the best in your artistic endeavors.
Below is one of my portrait painting process videos:
@artbyfib Painting Process. #CapCut #family #portrait #Acrylic #fyp #timelapse #art #dad #daughter #loss #love ♬ original sound - Skylan
The same process can be used for any subject you paint, like an animal for instance:
@artbyfib Hours of footage < minute. 🙃🙂Finished this gift in time for Christmas #process #spinning #speedpaint #Acrylic #paint #painting #dogportrait #boxer #dog #christmasgift ♬ Monkeys Spinning Monkeys - Kevin MacLeod & Kevin The Monkey


Comments
Post a Comment